Creating a Listing Alert
What is a Listing Alert?
A Listing Alert (Formerly referred to as a Hotsheet) is a tool where you can set custom listing search criteria, and then send your client automated, recurring emails that include listings which match that search criteria.
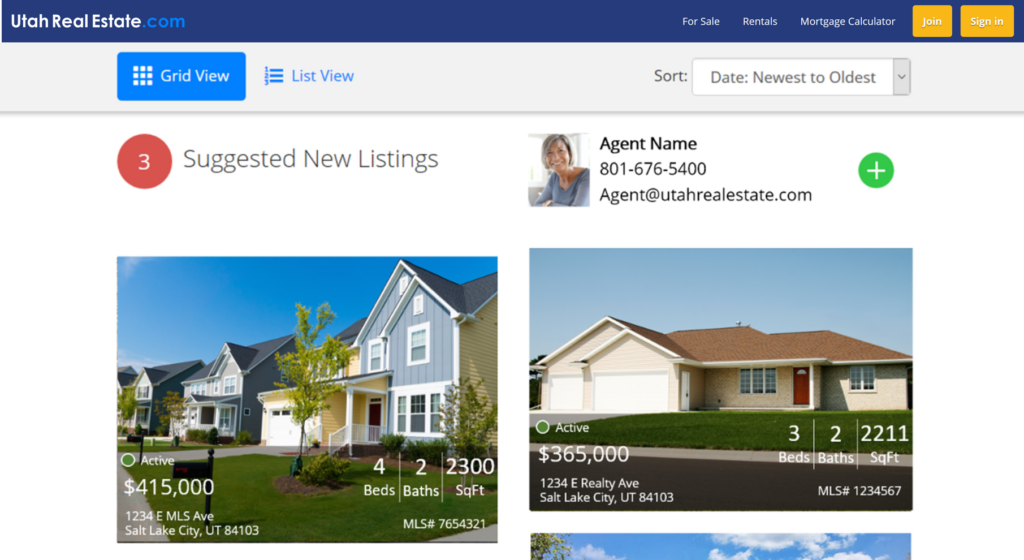
Listing Alerts are sent on an ongoing basis, which means that you and/or your client will receive emails (Example below) every time new listings that meet your search criteria are added to the MLS, as well as when listings that meet your search criteria have a status or price change.
How Do I Create a Listing Alert?
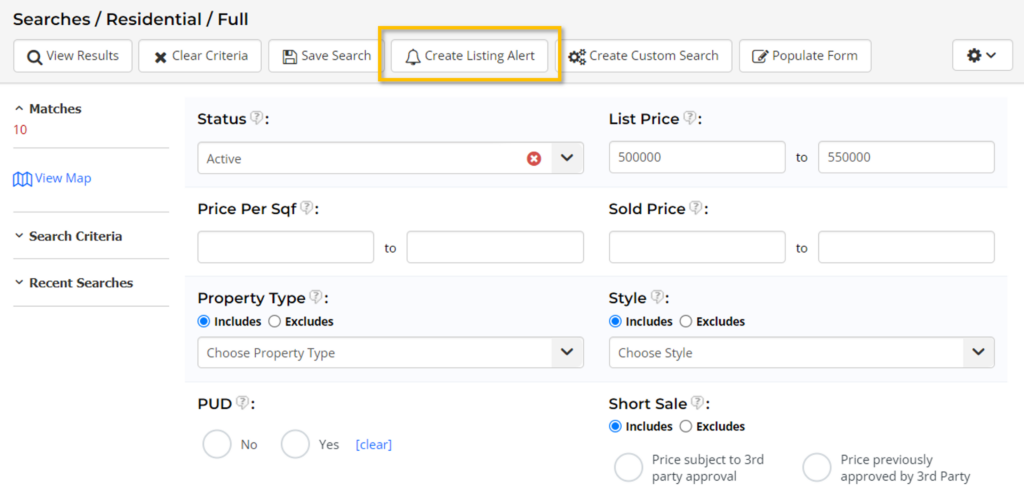
Step 1. Start by conducting a listing search in the MLS. Include only the criteria that is associated with the type of properties you are interested in receiving/sending information about. After you have established the search criteria you want to use as a basis for your Listing Alert, select the Create Listing Alert option.
Tip: Keep in mind that using very specific search criteria (Example: List Price between $400,000 and $401,000) will limit the number of listing results sent in the Listing Alert, while using very broad search criteria (Example: List Price between $1 and $1,000,000) can result in an overwhelming amount of listing results sent in the Listing Alert.
Tip: Use the Cross Property Search tool if you want your Listing Alert to include listing results from multiple different property types.
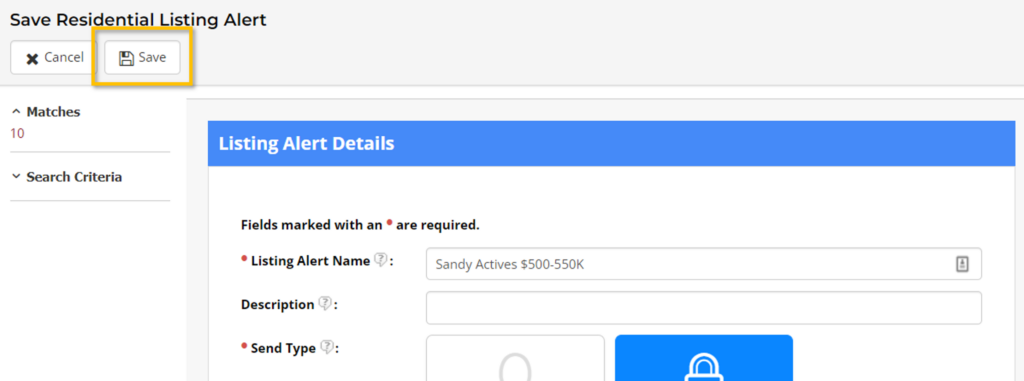
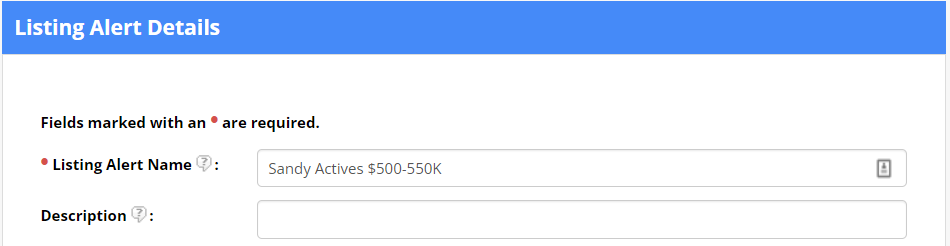
Step 2. On the Listing Alert Details page, start by creating a name for you Listing Alert. The name you assign will be the subject of the Listing Alert email (unless a different subject is entered under the Email Options section of the Listing Alert setup).
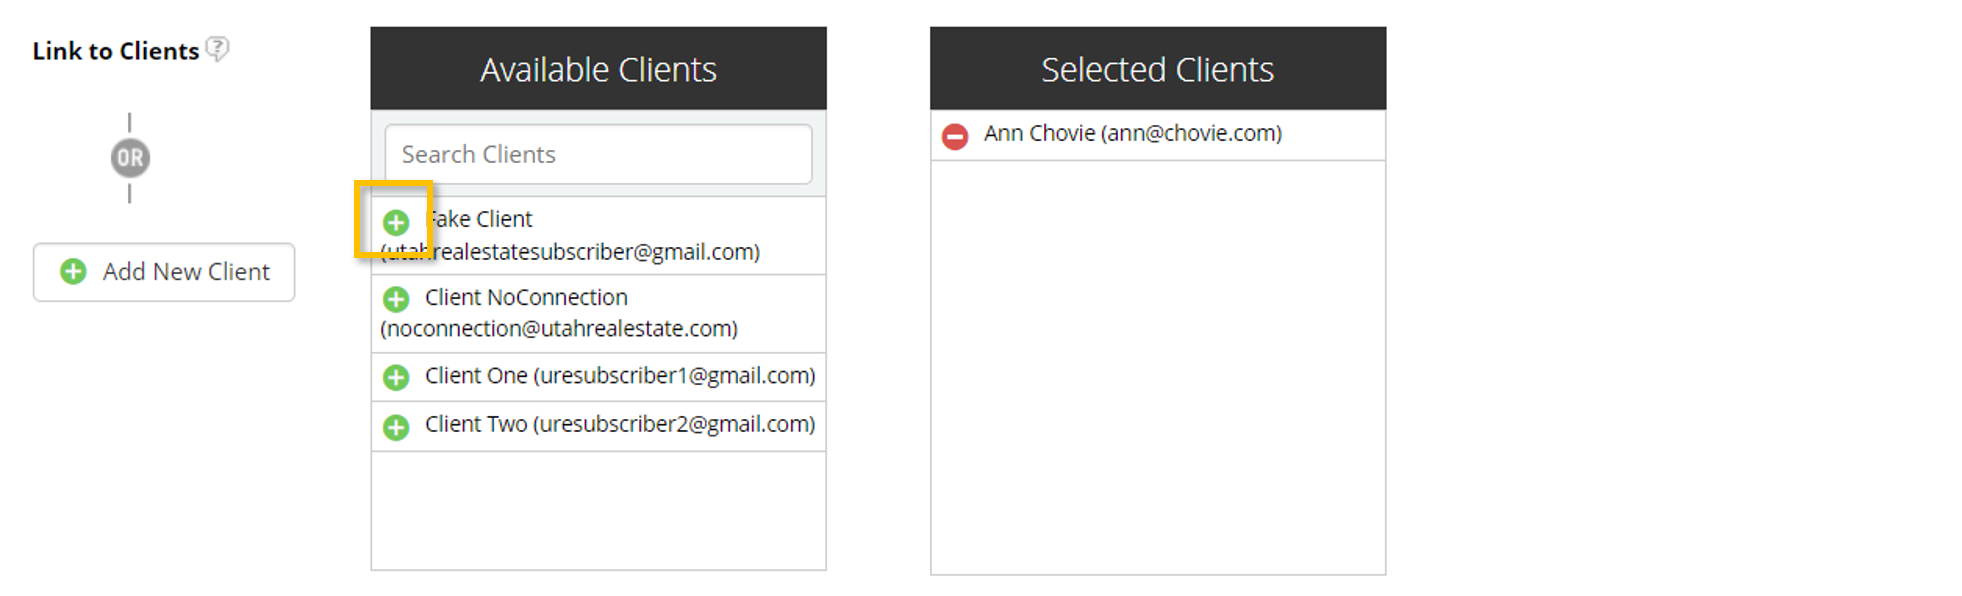
Step 3. Next, select the individual or individuals who you want to receive the Listing Alert. Because Listing Alerts are recurring emails that are automatically sent from the MLS system, a recipient must first opt-in or agree to receive these types of emails (i.e. Establish a Client Connection).
Once a Client Connection has been established, you will see the client[s] in the Available Clients section. Use the green plus sign to select Available Clients to receive the Listing Alert, or use the Add New Client option to add a new client and prompt the client to accept your Listing Alert emails.
Tip: If you want to receive a copy of the Listing Alert email, you can send yourself a copy of the email when configuring the Email Options later in the Listing Alert setup.
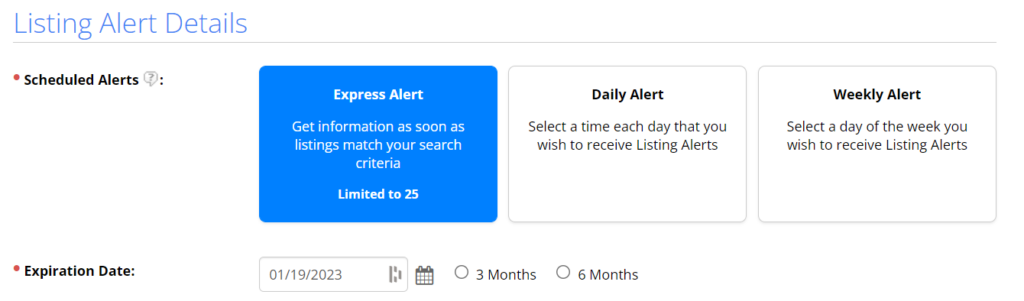
Step 4. Choose the type of Listing Alert notification you want your client to receive, which includes the following options:
- Express Alert: An Express Listing Alert email will be sent as soon as a listing matching your search criteria is added to the MLS or is updated (i.e. Status Changes or Price Changes). Please note: The Express Listing Alert option is a newer feature which is currently limited to 25 Express Listing Alerts. This limit is the total number of Express Listing Alerts which can be actively running from any one individual MLS account. This limit does not impact the number of listings sent through the Listing Alert.
- Daily Alert: A Daily Listing Alert email will be sent at a specifically designated time and will include all listings matching your search criteria that have been added to the MLS or have been updated (i.e. Status Change or Price Change) since the last time the Listing Alert was sent.
- Weekly Alert: A Weekly Listing Alert email will be sent on a specifically designated day of the week and will include all listings matching your search criteria which have been added to the MLS or have been updated (i.e. Status Change or Price Change) in the last seven days.
Step 5. The last section of the Listing Alert Details page is Email Options, which is where you can send yourself a copy of all of the Listing Alert emails, create a custom email subject, or add a custom message that will be sent with each Listing Alert email.
Note: Listing Alert emails are sent from the UtahRealEstate.com MLS system, however, if your client replies to a Listing Alert email, the “reply to” email address will be the email address associated with your MLS profile.
Step 6. Last, click the Save option at the top of the screen to save your Listing Alert.