Agent and Public Profile Settings
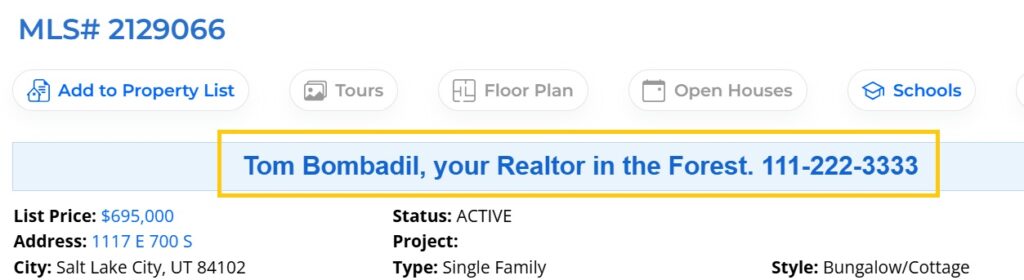
The UtahRealEstate.com Realtor® Profile can be seen by potential clients on your listings, in your Listing Alerts, and in the Realtor® database – commonly found through the most popular search engines. If you would like to generate leads through UtahRealEstate.com, add or update your photo, or change your contact information, you will need to edit your Profile.
Agent Profile
The Profile information is shown to other MLS members when viewing your member profile on UtahRealEstate.com. To view your profile, enter your name in the “Search Agent or Office” field at the top of UtahRealEstate.com.

Below are the steps to edit your Agent Profile:
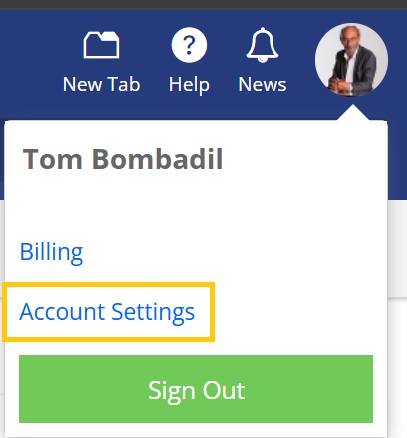
Step 1. Click on the user icon in the top-right corner and select Account Settings.
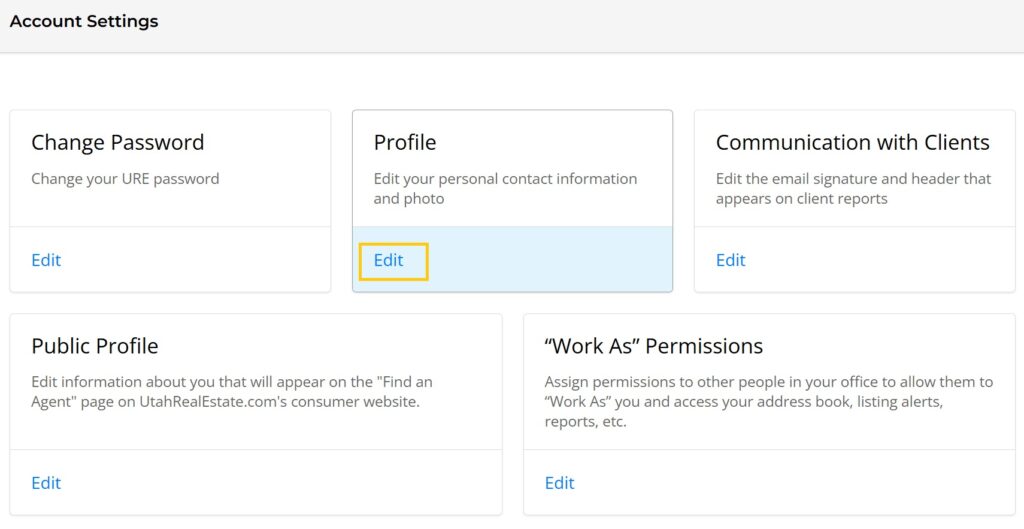
Step 2. Under Profile, click on Edit.
Step 3. To add your agent photo, scroll down to the Profile Picture section. Click on the large grey circle where it shows “Drop in your photo or click here to upload”. Select the photo file from your computer, and click Open. Crop and center the photo, if needed. Select Confirm when you are done.
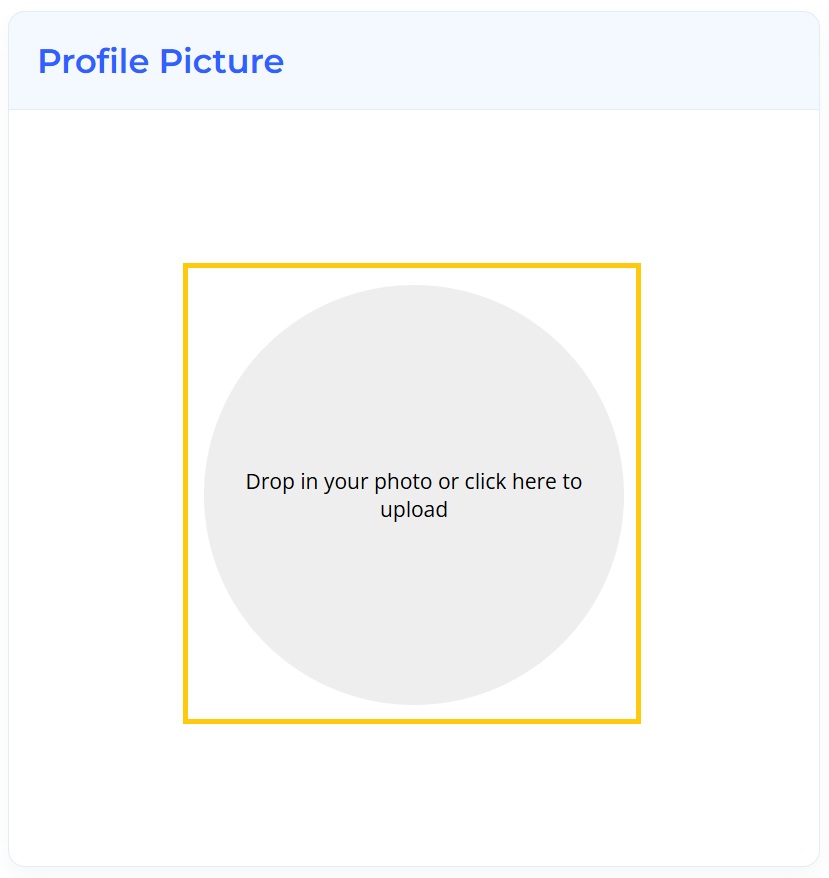
Tip: Updating an existing profile photo is easy. Simply click on your current profile photo on the right-hand side. Select the photo you would like to make your profile photo and click Open. Crop and center the photo, if needed. Select Confirm when you are done.
Step 4. Make any other changes to your profile as needed.
Note: This information can be viewed by the public and other MLS members. We recommend using the professional address and other contact information that you wish to be seen by the public.
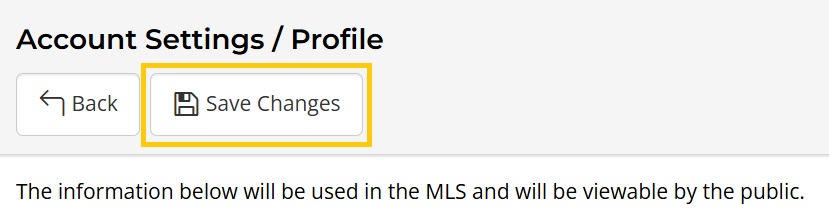
Step 5. Be sure to Save Changes at the top of the page when you are finished. You will be prompted to enter your password to verify the changes.
Public Profile
Your Public Profile is shown on the public site under the “Find an Agent” search option. To view your Public Profile, sign out of your MLS account, and search for your name under the Find an Agent search.

Below are the steps to edit your Public Profile:
Step 1. Click on the profile icon in the top-right corner and select Account Settings.
Step 2. Select View under Public Profile.
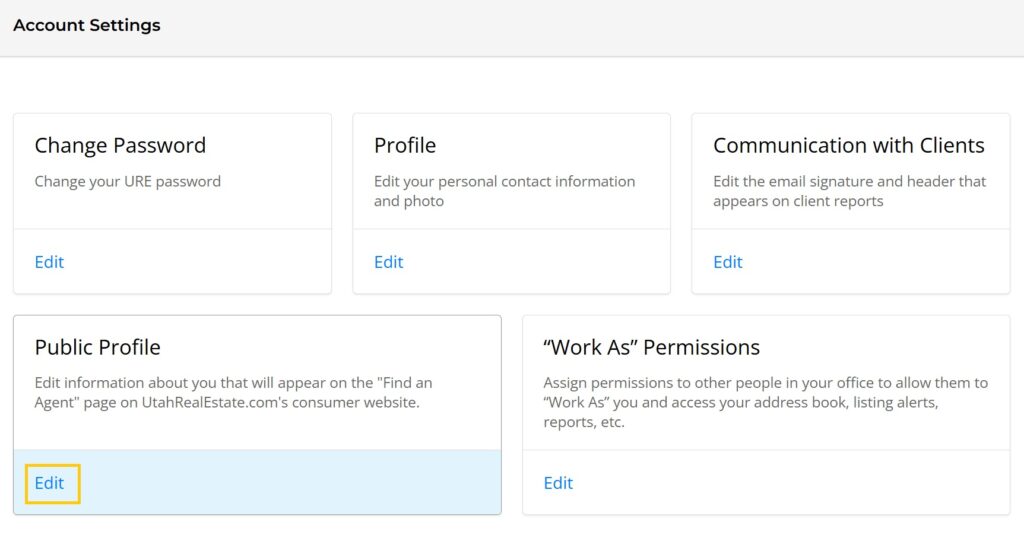
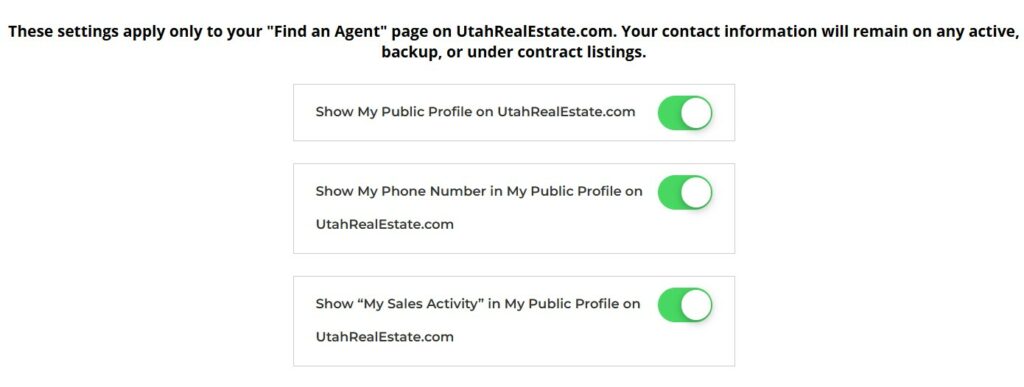
Step 3. In the top section, click on the toggle to the options on and off.
Read more about the public profile options here.
Step 4. Add additional information to your public profile as desired. Be sure to Save Changes at the top of the page when you are finished, and confirm the changes.
Communication with Clients
The Client Report Header is the text that is shown at the top of the client reports.

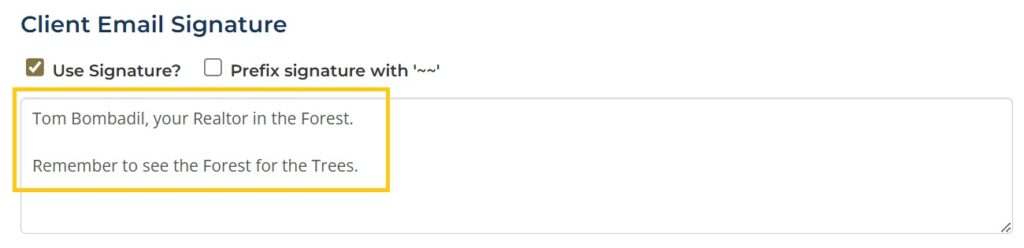
The Client Email Signature is shown at the bottom of emails sent to your clients, including Listing Alerts, Send Listings, and emailed PDFs including from the URE Forms section and CMAs.
Account Settings Video
See more in our short video here.


